Calibration
In order to achieve accurate measurement results, µZ needs to know certain parameters about itself and the environment it's being used in. To determine these parameters, the response of the system needs to be measured in two configurations:
- Short: End cap mounted directly onto the main tube.
- Long: Calibration tube mounted between the main tube and end cap.
Since µZ is sensitive to temperature, the calibration procedure needs to be performed at the start of every measurement session. If the temperature changes by more than 2 °C (3.6 °F) over the session, a new calibration is required. ACME has a built-in reminder that discards calibrations older than 12 hours, but cannot check for temperature changes.
Procedure
To calibrate your µZ system, open the Actions menu in ACME's menu bar and
click Calibrate µZ system:
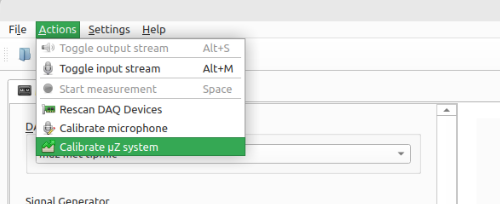
This will open the µZ calibration wizard, which will guide you through the
entire calibration process. Some additional information about the calibration
process is listed below. This information can also be found in the calibration
wizard.
Number of microphones
The calibration can be performed:
- without tip microphone: 4 microphones in total
- with tip microphone: 5 microphones in total
To include the tip microphone in the calibration procedure, enable it in the DAQ configuration. Check the compatibility chart below to see what method to use. It depends on the desired measurement configuration.
| Measurement configuration 4 mic | Measurement configuration 5 mic | |
|---|---|---|
| Calibration 4 mic | ✅ | ❌ |
| Calibration 5 mic | ✅ | ✅ |
Calibrating with tip microphone is always right. Calibrating with without tip microphone can be useful when less cable clutter is desired.
tip
Always include the tip microphone in the calibration.
Setting speaker output level
To get the best results, the speaker output should be as high as possible, without overloading the microphones. To make sure your output levels are correct, click the Check levels button in the Short calibration measurement screen of the µZ calibration wizard.
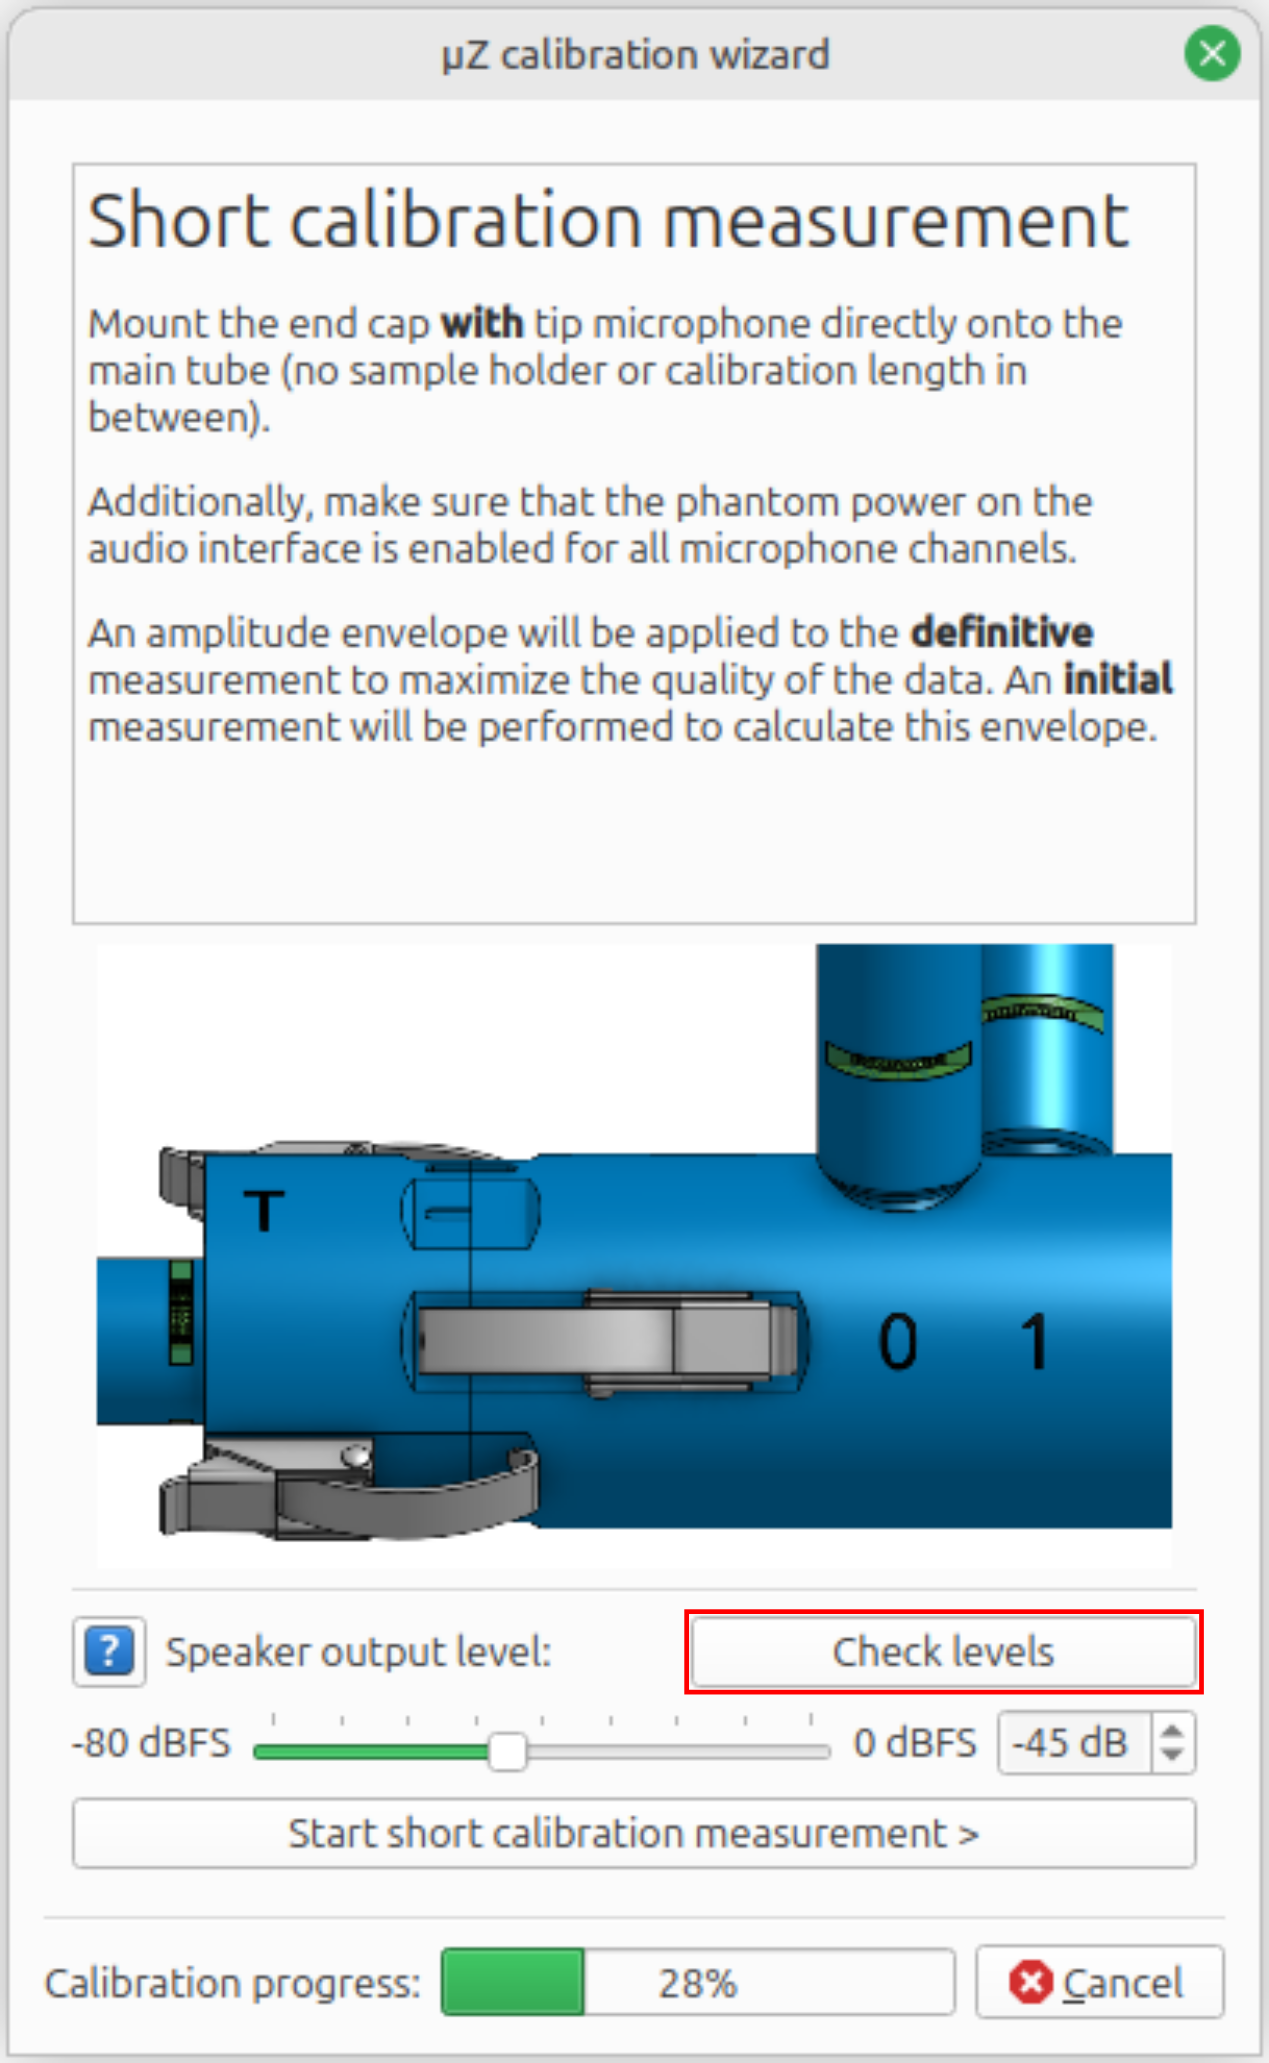
During the signals check, the speaker will play a fast sweep signal. The PPM bars should peak at around -8 dB1. A speaker output level of -44 dBFS (µZ-20) or -38 dBFS (µZ-30) usually works well.
tip
Remember the level you set in the calibration wizard. This level can be used for future calibrations and is a good starting point for µZ measurements, once the system has been calibrated.
Two-stage measurements
The calibration measurements are performed using a sweep signal. To maximize the signal quality for each measurement, an amplitude envelope is applied. For this reason, two measurements are performed for each configuration. The initial measurement is used only to calculate the amplitude envelope.
Signal checks
The µZ toolbox performs a number of checks on each measurement to determine whether the system is operating as expected. The checks include:
- Signal levels on the input channels: Are the power supplies of the speaker and all microphones enabled?
- Channel names: Is the data as expected based on the channel name?
- System identification: Is the system that's being calibrated a µZ-20 or µZ-30?
- System configuration check: Is the data compatible with a short or long calibration measurement?
If any of these checks fail, the calibration wizard will show an error message and give instructions on how the issue can be resolved.
note
If the calibration wizard shows an error of which you are sure it is incorrect (for example, a mislabeled input channel, while you are certain the channel names are correct) check all your connections and settings and restart the calibration wizard. Also check the signal generator level: If the level is too strong, the microphones may be driven into clipping. If the level is too low, the signal-to-noise ratio is insufficient for the internal checks. If the problem persists, please contact us.
Saving measurements
When the calibration wizard is closed after a successful calibration procedure, there is no need to save the measurements. Therefore this option is not offered.
Should anything happen to have gone wrong, you will have the option to save the measurements that were performed so far. These can aid with troubleshooting. If available, the definitive measurements are the most valuable to save: if one exists, it means that there were no problems with the corresponding initial measurement. Furthermore, the definitive measurements are what the calibration calculation is based on.
Troubleshooting
If the calibration wizard failed and you do not know why, save the measurements performed so far. Then plot and inspect the following items:
-
Plot the auto power spectrum of the individual channels.
- Check that all channels receive a clean signal.
-
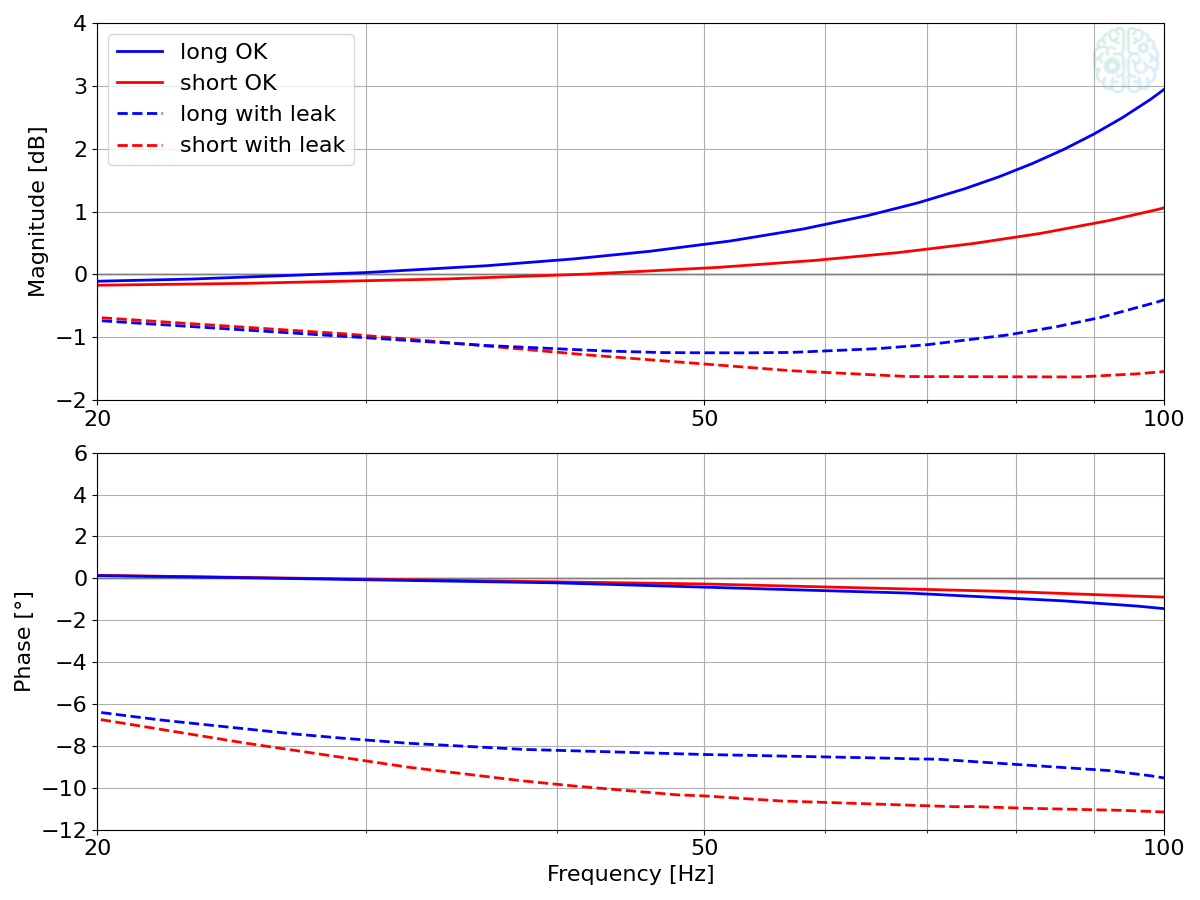
Plot the bode diagram with the following settings:
- Input channel: mic3
- Output channel: mic0
- Reference channel: mic3
- Check that the phase is within -3°...3° over the frequency range 20...100 Hz. If not, the system has a leak. See the figure below.
-
Plot the waveform of channel: mic0.
-
Zoom out to see the whole measurement.
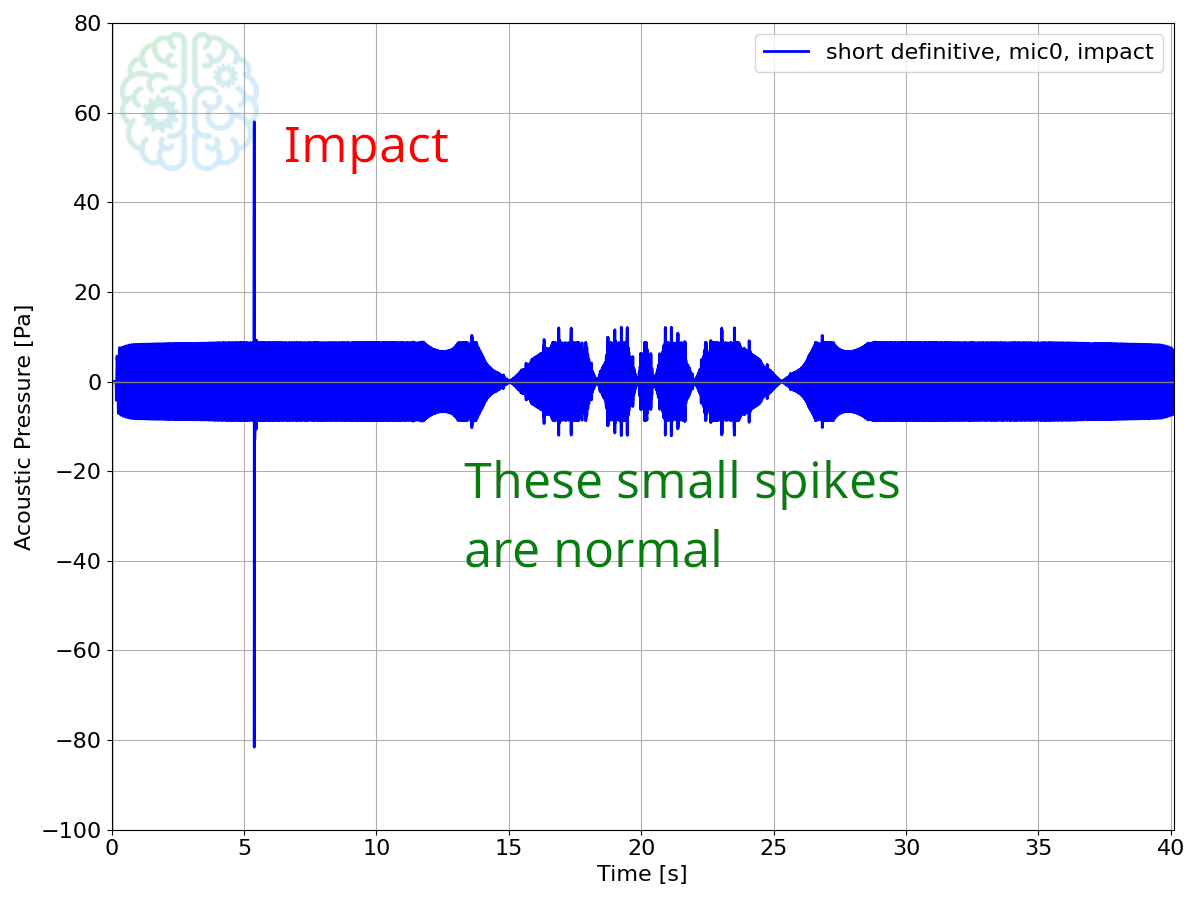
- Check that the signals are not contaminated by external sounds. Those could be from an impact or a Windows sound. The amplitude envelope should be mostly constant on the definitive measurement, except for several dips. Furthermore, it should be horizontally symmetric. If the envelope has a spike, which is either clearly stronger than the remainder of the envelope or makes the measurement asymmetric, that is an indication of an external sound. The figure below shows an example, with an impact at the 5 seconds mark.
-
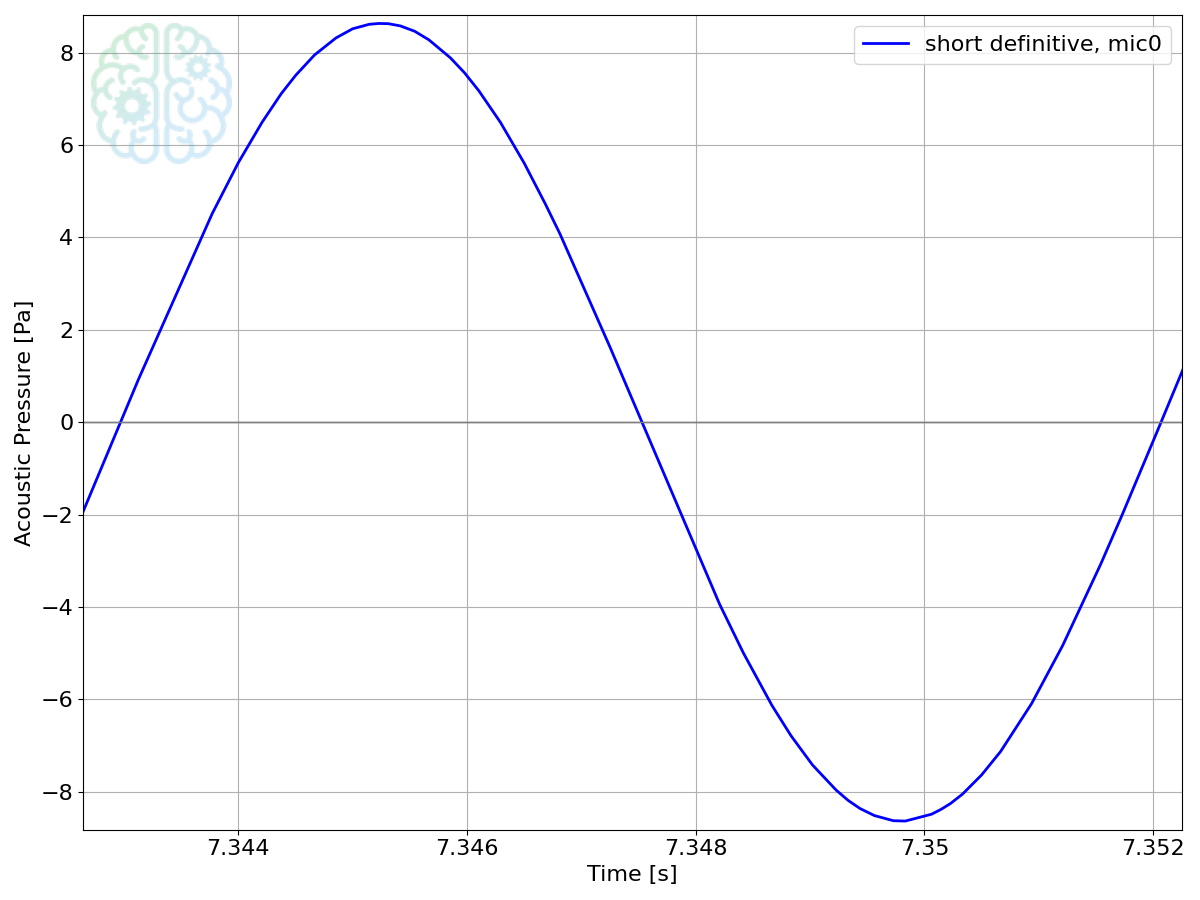
Zoom in on one wave. The figure below shows how it should look.
- Check that the signal peaks are not clipped: the wave should look like a sine wave and not have a flattened top or bottom.
- Check that the signal is not buried in the noise floor: the graph should be smooth and not scribly.
-
-
The input gain on the EVO16 used to be set to 0 dB for all microphone channels. In that case, the PPM should peak at -15 dB. In October 2025, we have updated the gain to +7 dB to make the PPM reflect the input range of the microphone. Now the PPM reads levels which are 7 dB higher. See the Audient EVO 16 page for instructions on how to update the gain. ↩