Series impedance measurements
This section describes the required hardware, software settings and measurement procedure to determine the series impedance of a thin acoustic sample, as a function of frequency. The sample has to be thin, as it is considered a lumped element. A thickness up to 1 mm is acceptable.
Reference measurement
For a series impedance, in addition to the measurement with sample measurement, a reference measurement is required. Both measurements share the same procedure and settings. The only differences are:
- Which sample disk (empty or with sample) is mounted in the sample holder.
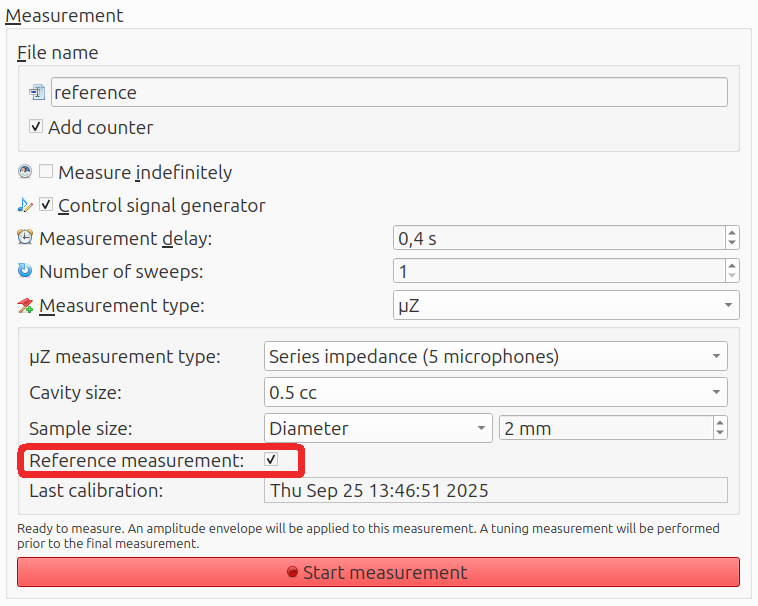
- Whether the checkbox
Reference measurementis ticked in ACME:

The reference measurement must always be performed before the measurement with sample. A reference measurement remains valid for 12 hours and will automatically be tied to the sample measurement.
Hardware
In addition to the main tube assembly, the following hardware is required to perform a series impedance measurement:
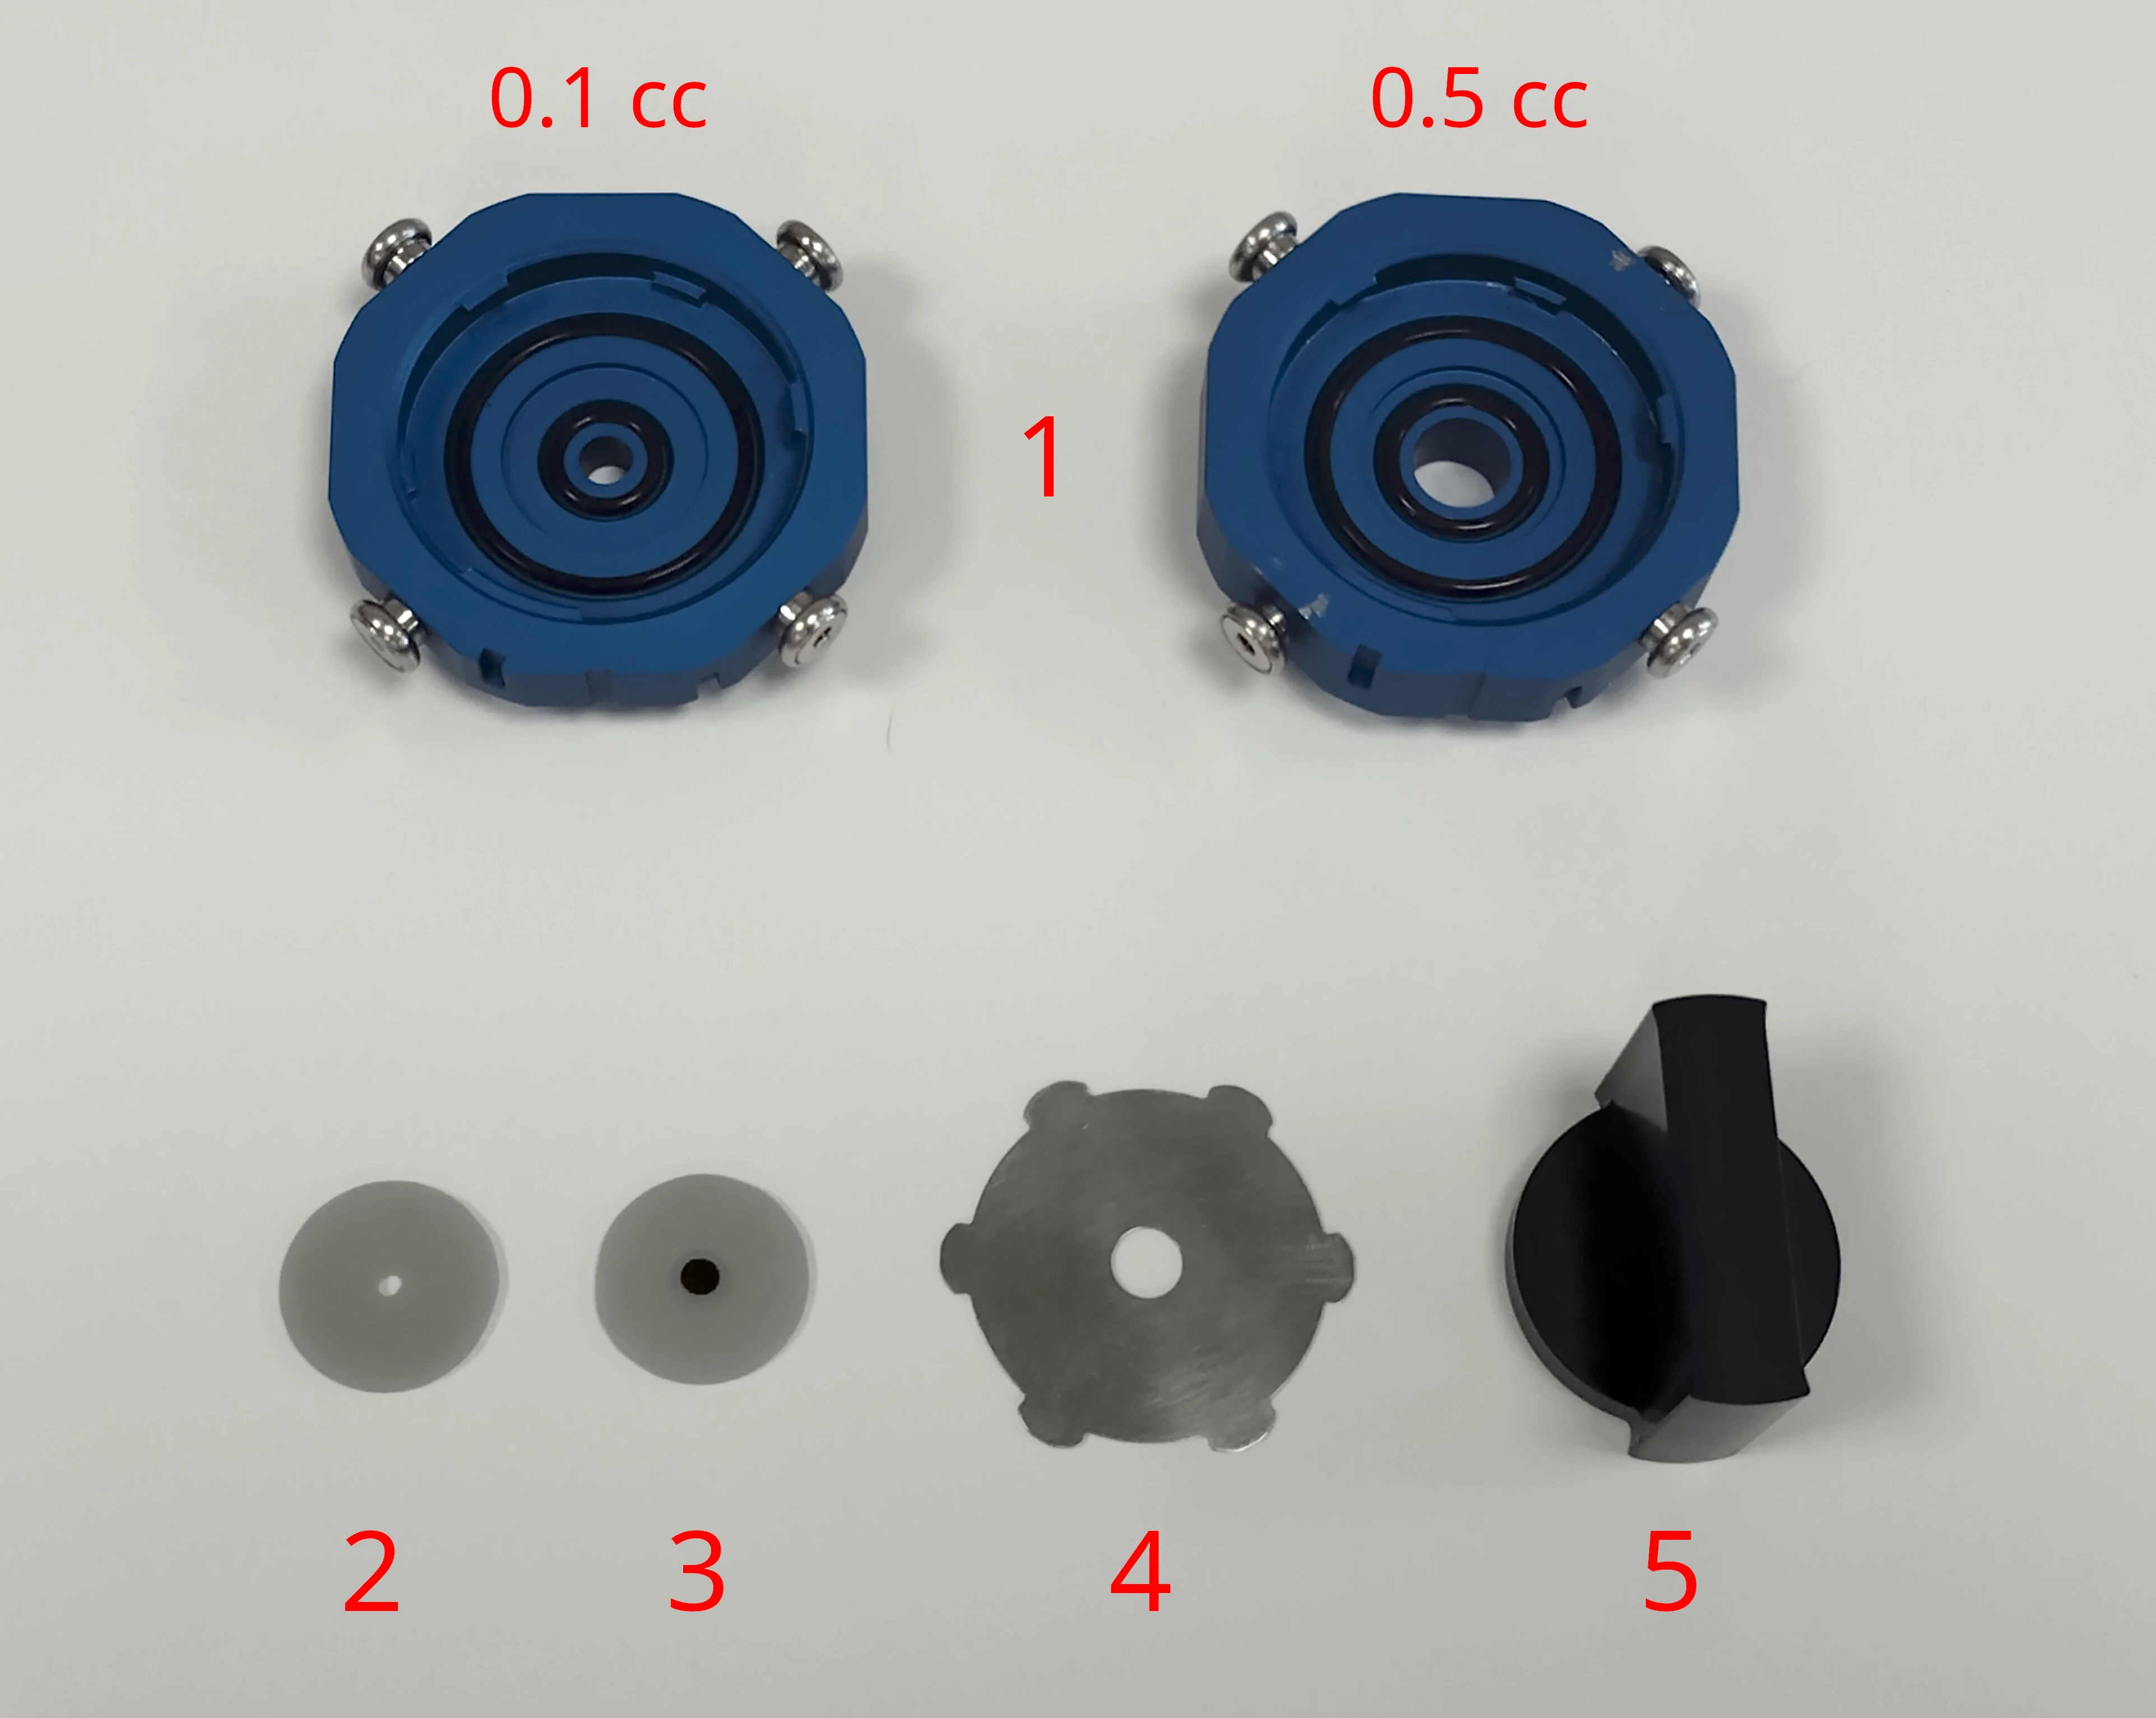
- Sample holder / back cavity:
- Two options: 0.1 cc or 0.5 cc. In 4 microphone mode, always use the 0.5 cc cavity. In 5 microphone mode, see Measurement configurations for selection guidelines.
- Sample holder disk (empty):
- This disk will be used for the reference measurement. Make sure that this disk has the same hole shape and size as the one with the sample on it.
- Sample holder disk (with sample):
- The hole diameter and shape in the disk should match the active area of the sample under test.
- Sample holder plate:
- This plate will hold the sample holder disks in place during the measurements and is required for an airtight seal.
- Sample holder plate mounting tool:
- Is used to lock the sample holder plate in place.
- Hard end cap with tip microphone (optional, not shown):
- This end cap should only be used for measurements in 5 microphone mode. For measurements in 4 microphone mode, no end cap should be used.

Mounting a sample
The procedure for mounting a sample in the sample holder is shown in the video below:
- Carefully place the sample on the sample holder disk, for example using a scalpel.
- Make sure the active area fully overlaps with the hole in the disk
- Press down on the sample to make sure the adhesive on the sample fully bonds to the disk and forms a seal
- With capacitative / compliant samples, be careful not to apply too much force. Doing so will strectch the sample, changing its acoustic properties
- (In case of capacitative / compliant samples) leave the sample to rest overnight
- For these types of materials the tension in the sample and thus its acoustic properties will change in the first few hours after mounting it on the disk.
- Place the sample holder disk in the sample holder, with the sample side up
- Place the sample holder plate on top of the disk
- Press down on the plate using the mounting tool and rotate clockwise until it locks
- If the plate does not fall out when holding the sample holder upside down, it is mounted correctly.
Mount the sample holder directly onto the main tube as shown in the video below. Remember to remove the calibration tube if you have just finished calibrating.
warning
The sample holders do not fit onto the calibration tube, only onto the main tube. Trying to mount a sample holder onto the calibration tube by force can cause damage to the system.
For measurements in 5 microphone mode, mount the end cap with microphone onto the sample holder. For 4 microphone mode measurements, leave the back of the sample holder open.
Sample holder disks
The sample holder disks, which are shown on the image above, are tailor-made for the samples under test. Their dimensions are as follows:
- Diameter: 17.8 mm (+0.1, -0.3 mm)
- Thickness: 1.1 mm (+0.05, -0.15 mm)
- Center hole diameter: matching the active area of the sample
There are two options for the material:
- Re-usable stainless steel
Suitable for all samples. Be careful to not scratch the surface when removing an old sample. - Disposable plastic
Suitable for meshes, but not for membranes. They can be 3D printed with a resin printer. It works best if the disk is standing on its edge. Place supports on the edge only and sand their residues off with 2000 grit paper. The center hole should be reamed to size before the final UV hardening stage.
The sample holder disk is under a bending moment when it is mounted. The resulting strain is small and does not significantly affect the back cavity volume. Even so, the strain is enough to have a measurable effect on the compliance, for some membrane samples. Therefore membranes should always be measured on a steel sample holder disk. This phenomenon does not apply to meshes, which typically are not sensitive to mechanical stress.
Software
These settings are specific to series impedance measurements. Other settings, like those for the signal generator can be found here.
Signal generator
Set up the signal generator according to Performing a measurement - Signal generator.
Measurement settings
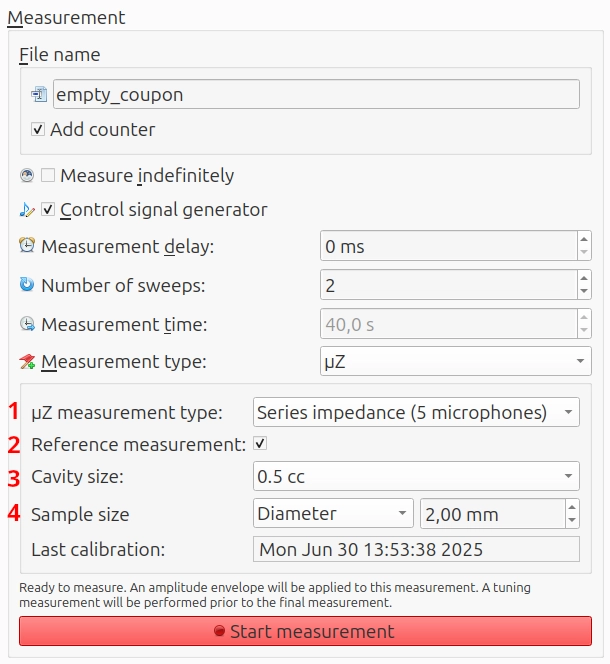
The recommended measurement settings, for series impedance measurements on a µZ system, are shown below.

The following settings are specific to series impedance measurements and are of interest to the user. All other settings should generally be set as shown above and are explained in Measurement settings.
- µZ measurement type: Indicates how the measurement should be processed during analysis. Set to
Series impedance (4 microphones)orSeries impedance (5 microphones)depending on the hardware configuration being used. - Reference measurement: Check this box when performing the reference measurement.
- Cavity size (5 microphone mode only): Indicates what size back cavity was used during the measurement (
0.1 ccor0.5 cc). - Sample size: Indicates the active diameter or area of the sample under test. This is used to calculate the specific impedance of the sample. It must be the same for the sample measurement itself and the accompanying reference measurement.
Performing the reference measurement
- Mount the empty sample disk in the sample holder and attach it to the tube.
- Check the box
Reference measurement. - Start the measurement.
Performing the sample measurement
- Replace the empty sample disk by one with a sample.
- Ensure the checkbox
Reference measurementis unchecked. Leave all other settings as they are. - Start the measurement.